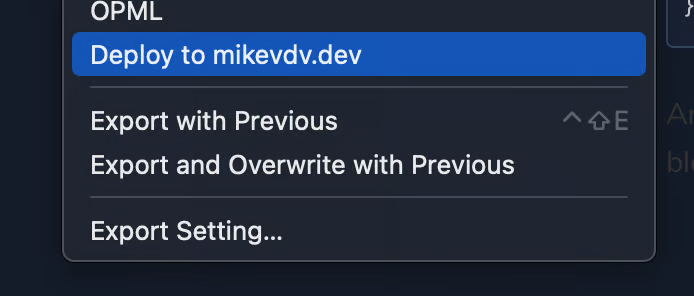
Blog Post Deployment
So I did a little more work on polishing the blog today. It now has author filtering, available from any post by a given author. I also put in some pagination. Obviously the pagination isn't visible just yet but I wanted to get it working before I needed it. The majority of my work was actually around releasing. See, the first blog post was actually added manually to the MongoDB database...
db.getCollection("blog").insert({})
For those who don't know, MongoDB is a BSON NoSQL database. This meant that I had to JSON encode the markdown for the blog post in order for me to put it in as a document. I also added some meta data (such as postdate and author). Now if you aren't seeing the problem here. let me show you what this looks like in the database.
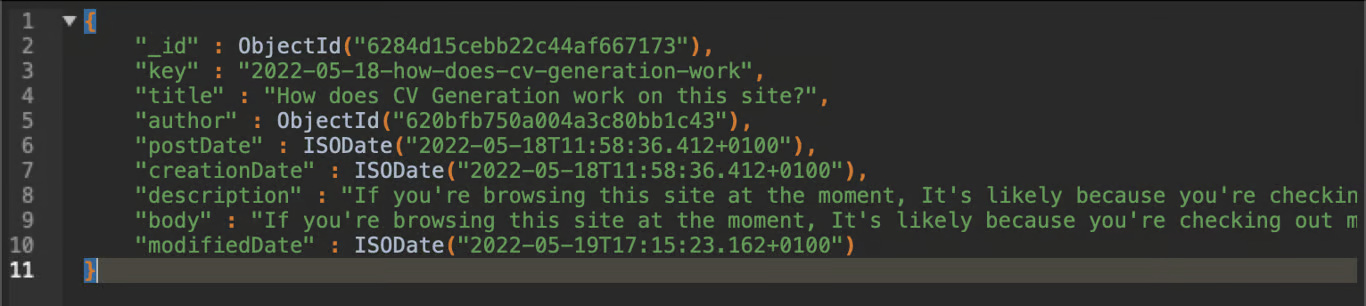
Yeah, gotta love full blog post bodies being encoded onto a single line with a bunch of escape characters and \n style new lines...
This all results in a situation where I can't actually edit the markdown directly, I'd need to export it, decode it, edit it, and then finally re-upload it.
Markdown Editing
For Markdown editing, I use a piece of software called Typora, have done for years. One particularly nice feature of Typora is that you can add custom export methods for your markdown files. This is done in a ui window where you can supply commands. Can see where this is going?
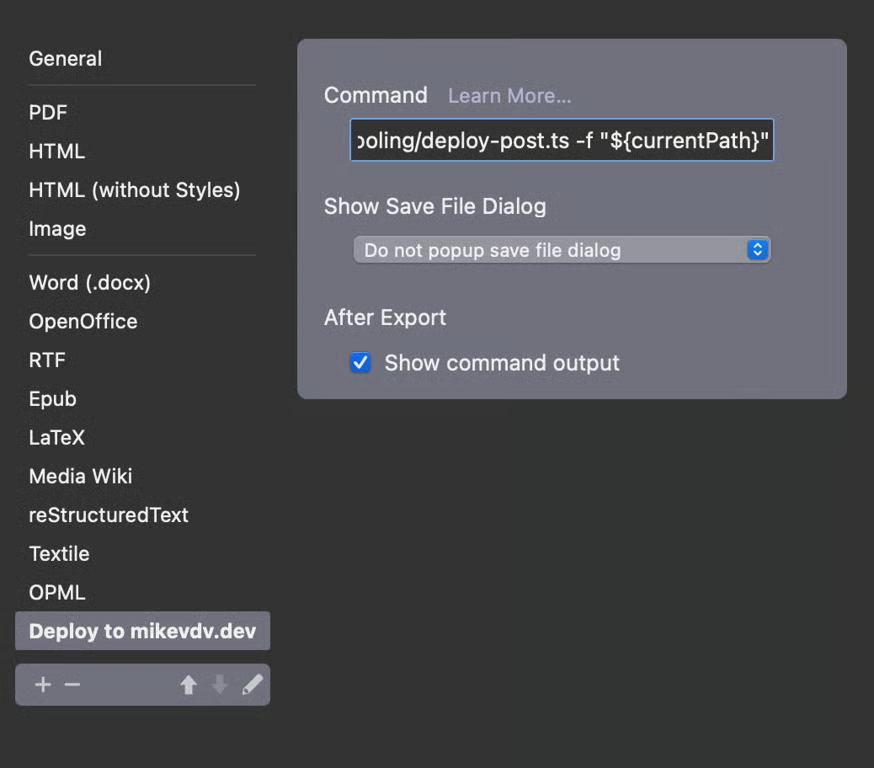
If you look at the small bit of that command that's visible, you can see it's executing a typescript file. That's being done without a build step by using ts-node so I could iterate on this script quickly. I could definitely have done this more efficiently in another language but when working on QOL improvements for yourself, it's better to bodge it.
You can also see it's passing currentPath, provided by Typora itself (thanks documentation) to the -f argument. Accessing this without need for a full Terminal command library like Commander is fairly straight forward as I wasn't doing anything complex or intractable.
/**
 * Gets a command argument. Returns null if it doesn't exist
 * @param code The argument character we are looking for
 */
function getArg(code: string): string | null {
  const index = process.argv.findIndex(arg => arg === `-${code}`);
  if(index === -1) return null; // findIndex returns -1 if nothing is found
  return process.argv[index+1] || null;
}
Handling the file
So at this point, I had a script in Typora, and I had a way of accessing the arguments that the script was passed, now I had to actually process it and add it to the database.
To begin with, the first thing I had to do was actually load the file into the scripts memory. I could do it asynchronously but this is a local script that will take at most a couple of seconds to run so I used readFileSync.
function loadMarkdown(filePath: string): { markdown: string } {
  let markdown = fs.readFileSync(filePath, { encoding: 'utf8' });
  return { markdown }
}
On the surface, that function works great. It reads the file and loads it into memory as a utf8 encoded string. Unfortunately, in markdown, your title is stored in the file indicated with the hash character and for the blog to work correctly, it actually need to be in the post metadata. To pull this out, I used a little bit of regex magic to replace the title with an empty string whilest defining a new variable title that I could add to the metadata.
function loadMarkdown(filePath: string): { markdown: string, title: string } {
  let markdown = fs.readFileSync(filePath, { encoding: 'utf8' });
  let title = '';
  markdown = markdown.replace(/# (.*)((\n\n)|\n)/m, (m, g1) => {
    title = g1.trim();
    return '';
  });
  return { markdown, title }
}
To explain that regex, it's looking for a # character followed by a space, grouping the following text into a variable called g1 provided that it then has either 1 or 2 new lines. /m just tells regex to work over multiple lines.
We also want to get our blog description which will just be the opening paragraph. Thankfully, markdown already puts paragraphs onto their own lines so we just need to find the first line that isn't an image, a list, or a title. It looks a lot more complex then it is.
const description = markdown.split('\n').find(s =>
    s && s.length > 0 && !s.startsWith('#') && !s.startsWith('!') && !s.startsWith('-')
    );
Theoretically, that should be fine, but this doesn't account for links. which appear in markdown as [text](url). Now if that appeared in google results, that wouldn't help our SEO. so we need to add another little regex to the end that grabs the text part and removes the rest.
const description = markdown.split('\n').find(s =>
    s && s.length > 0 && !s.startsWith('#') && !s.startsWith('!') && !s.startsWith('-')
    ).replace(/\[(.*)\]\(\/.*\)/gm, '$1');
The actual code also has handling for passing a description from the command line with -d but I think you can figure out how that fits together. With the end of this function, we have a nice little object containing the title, description and post body.
Checking for collisions
A fairly reasonable thing to want to do with a blog, is update old posts if you're proven incorrect or new information comes to light. As such, we can't just upload on every export and hope for the best. We first need to check if the post already exists.
We can do this by doing a MongoDB query, before we do our insertion. For now, I'll just do this of the blog title. While each blog post does have it's own unique ID, my local machine has no way of knowing what this is. The URL key also takes into account the postDate (we'll touch on that in a moment) but we have no idea if the post is published at this point.
async function getExistingBlog(title: string): Promise<BlogPost | null> {
  const db = await getDb();
  return (await db.collection<BlogPost>(env('BLOG_COLLECTION')).findOne({ title }));
}
Once we know if the blog post already exists, we can move on to the last few bits of metadata we need before uploading.
Three Timestamps
Timestamps are a funny one, we don't really want to be manually writing them out, but we do want the option of manually specifying a postDate in the event that we want a post to be released in line with an event in the future. For everything other than the lastModified time, we also want to pull it from the existing blog post in the database if it exists there. for that reason. Once these edge cases are handled, we can pull the rest of the information from the filesystem as all major operating systems already track things like creation date and last modified date. Finally, the postDate can be set to the current date, if it's not been pulled from anywhere else.
function getDates(filePath: string, existingPost: BlogPost | null): { creationDate: Date, modifiedDate: Date, postDate: Date } {
  const { birthtime, mtime } = fs.statSync(filePath)
  const dates = {
    postDate: existingPost ? existingPost.postDate : new Date(),
    modifiedDate: mtime,
    creationDate: existingPost ? existingPost.creationDate : birthtime
  }
  const releaseDate = getArg('r');
  if(releaseDate) dates.postDate = parse(releaseDate, 'yyyy-MM-dd:HH:mm', new Date());
  return dates;
}
fs.statSync is a bit of an odd name given what it does but it is rather easy to use and gets us the information we need and then some.
Creating a url key
The Url key is probably the simplest thing we've done in this entire script. We just have to grab the title, rip out anything thats not URL friendly and replace spaces with dashes. From there, we can append a nicely formatted timestamp to the start and voilla! We have ourselves a unique url key.
function createKey(postDate: Date, title: string) {
  return `${format(postDate,'yyyy-MM-dd')}-${title.toLowerCase().replace(/[\W_]+/g," ").trim().replace(/ /g,'-')}`;
}
Putting it all together
I did do some other file reading to get the current git.email value so we can fetch the site user (the same one that the CV is connected to) but that's basically hardcoded so we won't cover it here. At this point, we have all the metadata we need and can go about adding it to our database.
We can use MongoDBs insertOne or updateOne for this, but because we want to update existing posts if they exist we'll use updateOne with upsert:true passed to the options. This makes MongoDB insert a new item if it can't find a match for the update query.
async function writeArticle(blog: BlogPost) {
const db = await getDb();
  const collection = await db.collection<BlogPost>(env('BLOG_COLLECTION'))
  await collection.updateOne({key: blog.key}, {$set: blog}, {upsert: true}
}
And with that, our script can upload articles to the database, All that's left to do is go to this very blog post and run the export script.