OG Images with Cloud Functions
If you follow me on social media, you're probably aware of the social image that shows up for any articles I share from this site. It's a giant image of my face. Now I don't know about you but I don't think this is a great image for getting engagement. I wouldn't click it...
[tweet 1530986495850446852]
This is done by setting a page's OG (Open Graph) Image in the html head of your page. The Open Graph protocol allows you to turn any web page into rich objects for social media sites. In the example above you can see that the tweet shows an image, the page title and short content extract. If you were to check the head element of this page, you'd find a few different meta properties prepended with. og but today we're specifically looking at og:image and its twitter substitute twitter:image. As this page is using svelte, it was added in the following manner.
<svelte:head>
  {#if headerImage}
    <meta property="twitter:image" content={headerImage} />
    <meta property="og:image" content={headerImage} />
  {/if}
</svelte:head>
As you can see it's wrapped with a little if statement to ensure that we only add it if there is one. In practice however, the code just uses the author image if there isn't one.
export let post: BlogPost;
let headerImage: string;

$: if(post && post.headerImage || post.author.img) { // This tells svelte to run the following code anytime that post, post.headerImage or post.author.image are reactively changed. Similar to a vuejs watcher function.
	headerImage = post.headerImage || post.author.img
}
I don't actually have a way to create OG images at the moment but Github did a post not too long ago about creating a service for generating OG Images dynamically from repositories. (Which can be found here.) I took this as inspiration, and decided to build something similar using Cloud Functions. As OG Images are downloaded only a few times by each social media platform, it doesn't make sense to pay for a service to always be running.
I'll go through setup, but I'm going to assume some understanding of setting up typescript projects with Rollup.
Setting Up
To begin, I created a new folder in my dev environment and ran the usual commands to set up a basic node project. I installed Rollup and Typescript to set up a simple build flow before installing the @google-cloud/functions-framework which we'll use to build our function.
Before we start writing any code, let's set up the build script to use Rollup with a standard typescript config as well as a dev command which will run the build command and host the cloud function locally via functions framework.
{
  "scripts": {
    "dev": "npm run build && functions-framework --target ogImageGen",
		"build": "rollup -c --configPlugin typescript"
	}
}
Functions Framework will try and find the function named in the dev command (in this case ogImageGen) in your package.json's listed main file. so make sure that wherever your Rollup script is building to is listed as the main file.
With that all set up. We can start building our src/index.ts script (or wherever your main source file is)
Building the Image Generation function
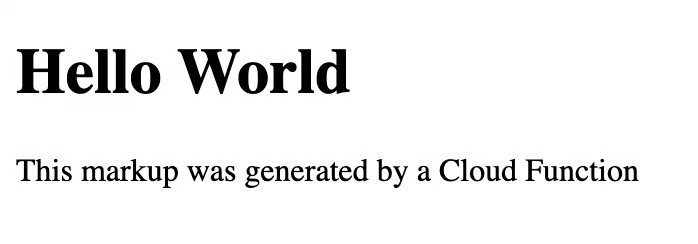
To begin, let's create a basic cloud function which returns some HTML. If you read through, you can see we import the http function from functions framework and that this function takes a Express-style request handler as an argument.
For this, basic example we don't actually use req yet but as you can see we call setHeader on res to inform the browser we'll be sending UTF-8 encoded HTML. We then call res.send to send the HTML.
import { http } from '@google-cloud/functions-framework';

const html = `<!DOCTYPE html>
<body>
  <h1>Hello World</h1>
  <p>This markup was generated by a Cloud Function</p>
</body>`;

export const ogImageGen = http('ogImageGen', async (req, res) => {
  res.setHeader('content-type', 'text/html;charset=UTF-8');
  res.send(html);
});
If we run our npm run dev command, you should get a localhost url to a page that matches the html variable in the code.
It may seem strange that we're starting by generating a basic html page, but in actuality we're going to use Puppeteer to generate an image from html. That means that the basics of our code are already there with the example.
Let's quickly install Puppeteer with npm i puppeteer. After importing it into our file by adding the import statement to the top, we can start to tweak our code.
import puppeteer from 'puppeteer';
Puppeteer works by creating a headless version of chrome on the server which we can use to generate the image that we want. The first thing we need to do to achieve this is create our headless browser instance. We can do that by adding the following to the start of our ogImageGen handler.
export const ogImageGen = http('ogImageGen', async (req, res) => {
  // Create a new puppeteer instance
  const browser = await puppeteer.launch();
  const page = await browser.newPage();

  // The existing code
}
Think of the page as a tab which we can load content into, either from a URL or from pure HTML as we're going to do here. To load our HTML into Puppeteer,We can call the setContent function.
// Set our html as the page content
  await page.setContent(html);
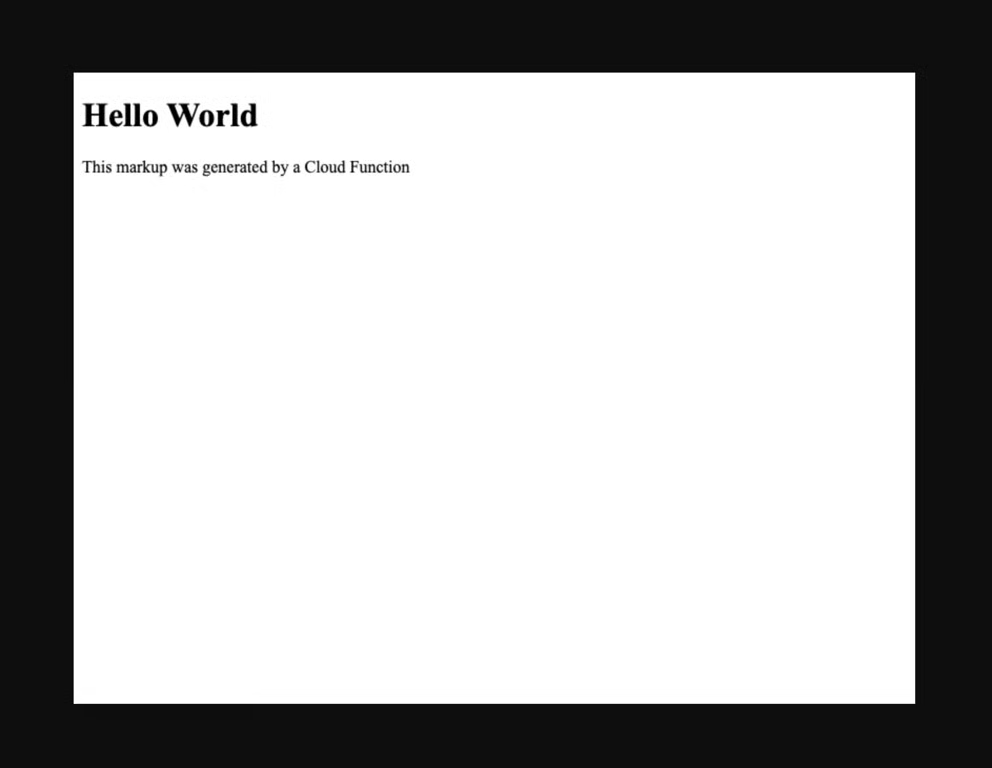
The last bit of our basic implementation is to call screenshot on our page and save the output to a buffer. We could also save it to a file system, but I'll be using Cloudflare Images for caching so I won't be needing that.
// Take a screenshot
  const buffer = await page.screenshot({});
At this point we have a screenshot, but we still need to upadate our response so that we send the screenshot rather than the HTML. To do that, we change the content type to image/png and send the buffer instead of the HTML. Once we've done that, our new function looks like this.
import { http } from '@google-cloud/functions-framework';
import puppeteer from 'puppeteer';

const html = `<!DOCTYPE html>
<body>
  <h1>Hello World</h1>
  <p>This markup was generated by a Cloud Function</p>
</body>`;

export const ogImageGen = http('ogImageGen', async (req, res) => {
  // Create a new puppeteer instance
  const browser = await puppeteer.launch();
  const page = await browser.newPage();
  // Set our html as the page content
  await page.setContent(html);
  // Take a screenshot
  const buffer = await page.screenshot({});

  // return the screenshot as the content
  res.setHeader('content-type', 'image/png');
  res.send(buffer);
});
After running our cloud function again, we should now be sent the following image.
Now at this point, you probably want to do some html and CSS work to design your image. I recommend designing your image with static data before you go linking it to any sort of database. This is what I ended up designing quickly but you can definitely do better with a bit more time.

The recommended image size for OG Images is 1200x630. The easiest way to get a consistent image size is to create a div with an og-image class on it. You can then set the width and height with CSS. I'd also recommend you have box-sizing: border-box; setup. With that, you can then take a screenshot of the div instead of the whole page by updating the screenshot code to the following.
// Find the div with the og-image class
const element = await page.$('.og-image');
// Take a screenshot of the element
const buffer = await element!.screenshot({});
You can pass in query variables to your cloud function using req.query which in my case, I use to do a database lookup for the correct blog post and author details. The Title, Post Date, Article Author and Avatar URL are all pulled from the database. In order to put that information into image, I created a very simple templating system using handlebars style insertion.
// Set our html as the page content
  await page.setContent(html.replace(/{([a-z0-9_ -]*)}/gi, (g1, g2) => (post as any)[g2] || ''));
As I've said in previous posts, even if I don't currently have any plans to get guests in for articles. I build everything with flexibility in mind.
Deploying your function
To deploy your function, make sure you have the google cloud sdk installed on your computer and have set up a project in google cloud. From there, you should be able to use the following command to build and deploy your function.
npm run build && gcloud functions deploy ogImageGen --runtime nodejs16 --trigger-http --project [projectName] --region [your region]
Or if, like myself, you want to set up auto deployment, you can use the Google cloud build plugin for Github with a cloudbuild.yaml similar to the following.
steps:
- name: node
  entrypoint: npm
  args: ['install']
- name: node
  entrypoint: npm
  args: ['run', 'build']
- name: node
  entrypoint: npm
  args: ['prune', '--production']
- name: 'gcr.io/google.com/cloudsdktool/cloud-sdk'
  args:
  - gcloud
  - functions
  - deploy
  - ogImageGen
  - --entry-point=ogImageGen
  - --region=[your region]
  - --project=[projectName]
  - --runtime=nodejs16
  - --trigger-http
Wrapping Up
At this point you should have a working og image generator. If you can't seem to get a bit of this working, leave a comment and I'll see if I can help out. In any other case, all that's left now is for me to update meta information for the blog. Go on, see if it works and share this article on social media!
One thing that should probably be noted, memory usage by puppeteer can be up to 1gb with quite minimal sites. As such you should definitely have some form of caching in front of this project.